This is a Drastic Remake of a Traditional "Shire" into a dragon. I started this because the Shire was purchased in a body box with his head/neck gone, 2 hooves cut either off or partially, and he didn't have a tail. I had the head and the removed hooves, but decided instead to do something more... fun... with him. So, he's being reborn as a dragon. | 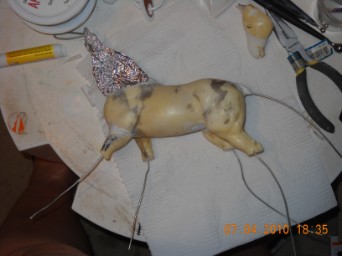 |
Starting to bulk him out some. He's got the start of a long reptilian tail, a neck, and you can see I'm playing with the position of the feet and lower legs with the wire. The tail wire is one solid, very long wire that goes inside the hollow body and out the neck, and is also the same wire you see as the head loop. Its been secured to the inside of the body in at least 3 places - the where the tail exits the plastic under body, inside the body itself right about half way, and at the base of the neck, under the foil filler. That tail is very secure. | 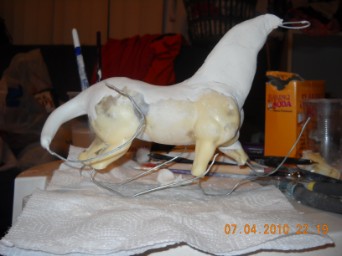 |
His wings, or at least the armature for them. The measure approx. 10 inches on the top line from end to end. The inner wing wires at the longest are between 4 and 5 inches long. They aren't small! | 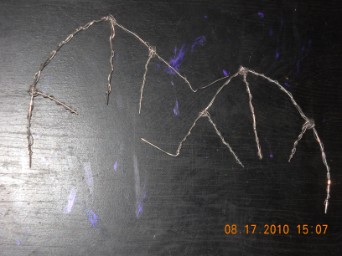 |
The wings after attachment to the body. I realized afterward that putting them on NOW wasn't such a good idea, but as they are literally cemented into the plastic and through the dried Paperclay with baking soda/super glue - its a bit too late to remove them now. He's also got his head back, and more done to his tail. |  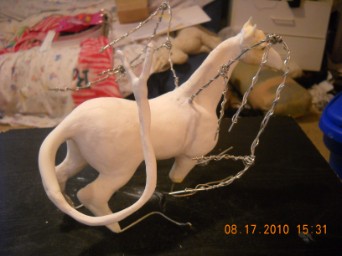 |
The wire got covered with a 2 part resin product called Amazing Sculpt. Its the only apoxy product I use because I just love the way it cures. While it was still wet, I cut bits of cheesecloth and literally stuck them into the raw A.S. His head will eventually be completely covered with resin - that will be a very stressful day because I'll only get one shot at it, and in the climate I live in, it will start to soft cure within 2 hours. Not a very long work time for me to sculpt an entire dragon head! Needless to say, it will be done in parts. I also spruced up the tail some as well. The cheesecloth will be covered with a product I have not used before (thats what experiments like this are for, right?) - Golden's Hard Molding Paste. The experts at the art store told me this was the product I was looking for - and it has the added bonus that it can also be used to fill in pinholes on resins as well. I considered that to be a very good thing! Any time a product can be used in multiple ways makes me very happy. So, thats where he's at right now! (updated on 8/30/10) | 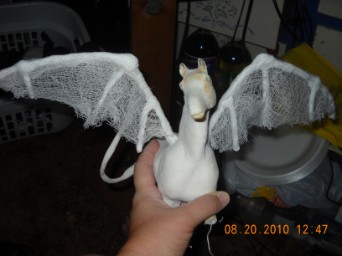 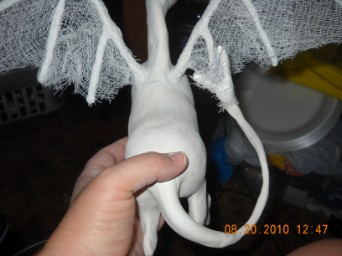 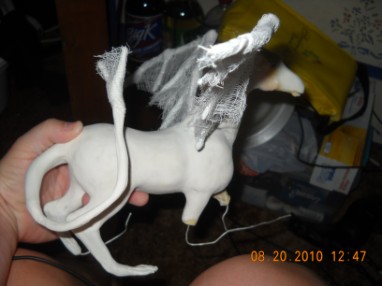 |